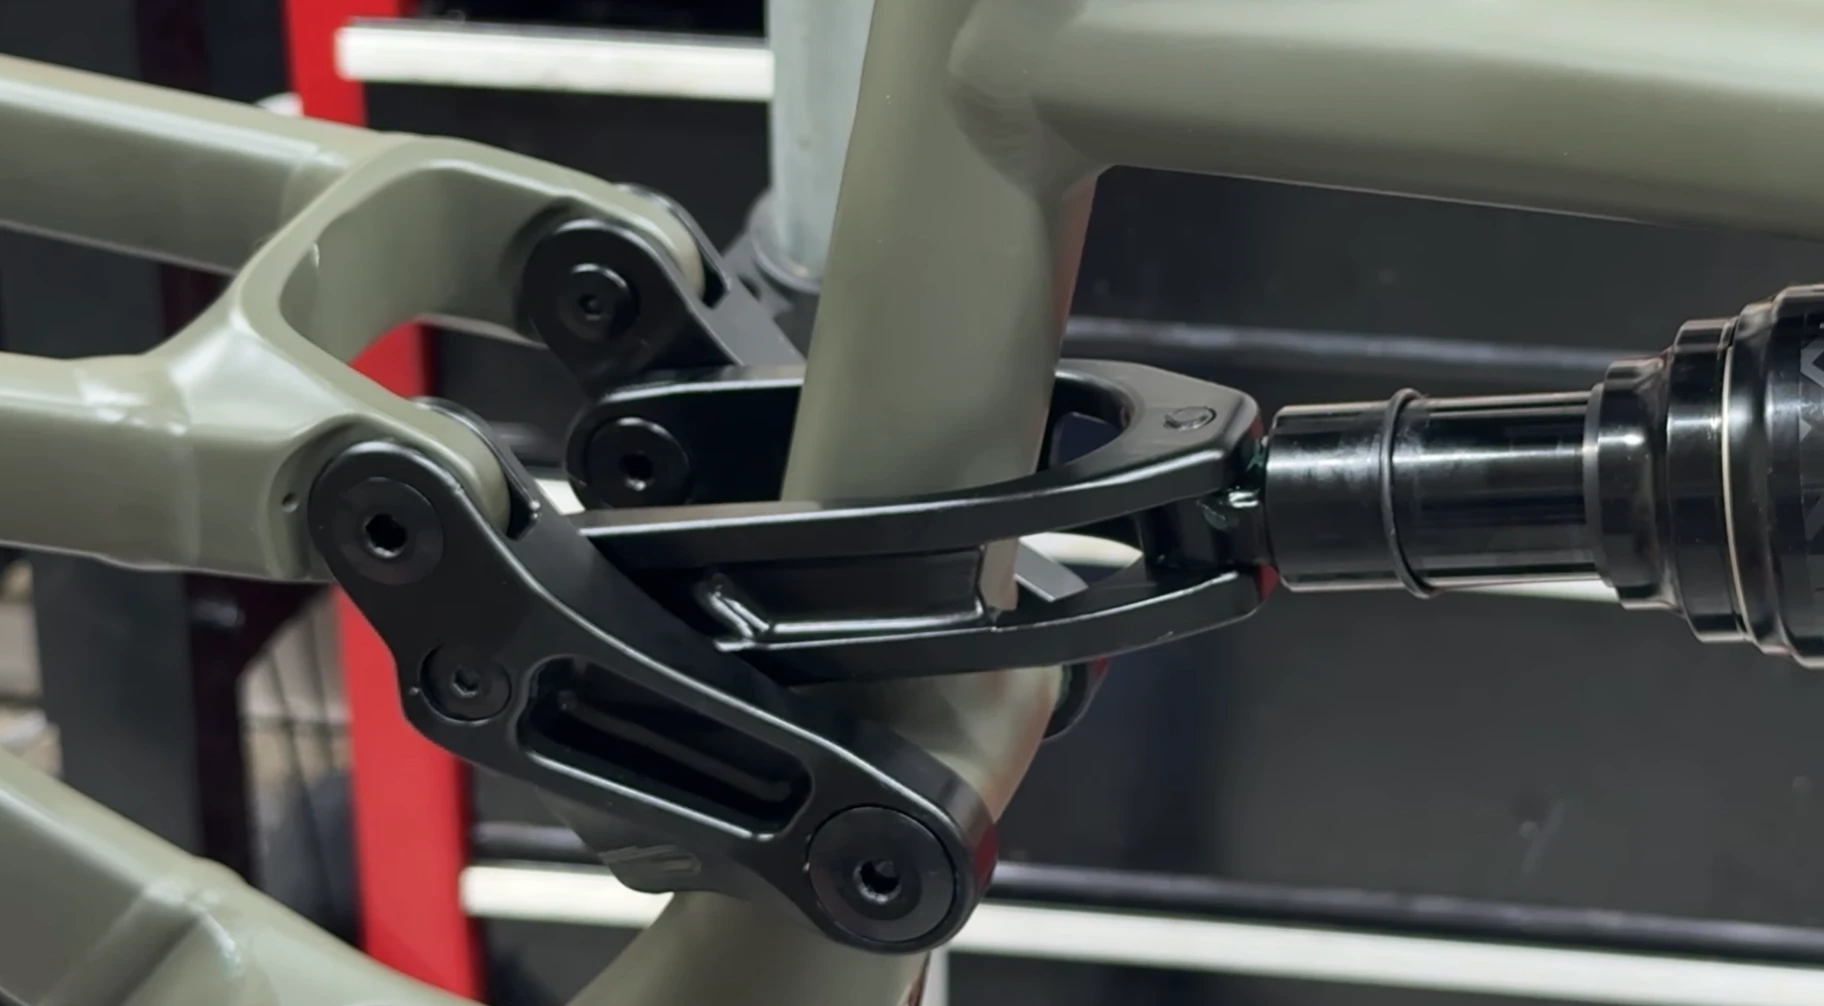
This is part two of my Stumpjumper 15 Alloy build series. If you missed the setup — why I picked an alloy frame on sale over a carbon build, and why reliability has mattered more to me than ever since a Cannondale carbon frame broke on me — start with part one. This post covers the single biggest change I made to how the bike actually rides: swapping the stock shock link for a Cascade Components 156mm mullet link.
Why touch the link at all
The Stumpjumper 15 Alloy ships with 145mm of rear travel and a stock link tuned around that number. It’s a good platform out of the box, and plenty of riders will never feel a need to change it. But I wanted two specific things the stock link doesn’t give you: more rear travel to match the capability of the 160mm-travel Fox 36 up front, and a more progressive leverage curve to make the most of the GENIE shock’s bottom-out resistance. A shock link is really just a lever — change its shape and you change how much the wheel moves for a given amount of shock stroke, and how that ratio shifts through the travel. Cascade’s business is designing links that reshape that curve without touching the frame’s geometry, which is exactly the kind of change I wanted: more capability, same bike underneath it.
Getting one that actually fits
Here’s the part of this story that’s worth telling on its own. Cascade’s mullet links for the Stumpjumper 15 were originally designed around the carbon frame only. I wanted one for the alloy version, and when I reached out to ask, that compatibility didn’t exist yet — the carbon and alloy frames aren’t identical where the link mounts. So I contacted Cascade directly, and after that conversation they developed an updated 156mm link engineered to work across both frame materials. It’s not available for S1 or S2 sizes, so if you’re on one of the smaller frames, confirm fit with Cascade before you order. But for the rest of the size range, the alloy Stumpjumper 15 now has the same link option the carbon bike does. That’s a genuinely good sign for a small suspension-parts company: they’re paying attention to real requests instead of only building for whichever frame sells the most units.
The link bumps rear travel to 156mm and reshapes the leverage curve to be dramatically more progressive — Cascade’s own numbers put the stock link’s progression on a mixed-wheel setup like mine at just 4%, and their link takes that to 26%. That’s not a subtle tune, it’s a fundamentally different suspension curve, which is exactly why it opens the door to running the bike softer off the top for small-bump sensitivity while still having far more resistance to bottoming out when things get rowdy. Geometry stays where Specialized set it — no change to head angle, reach, or bottom bracket height from the link swap alone. That matters to me, because I didn’t want to solve a suspension problem by accidentally creating a geometry problem. The link itself is CNC’d from 6061-T6 aluminum and runs sealed Enduro MAX bearings at every pivot, which matters more to me than it might sound — bearings are the thing that quietly wear out and get ignored until they’re grinding.
Installing the link
This isn’t a complicated job, but it rewards patience over speed, because you’re working around sealed cartridge bearings and a fair number of small fasteners that all need to go back exactly right.
Start by removing the stock 29er link and yoke. Pull the pivot hardware, keep it organized — I lay mine out in the order I pulled it, left to right, so reassembly doesn’t turn into a guessing game — and set the stock link aside. If you ever go back to full 29-inch travel, you’ll want it.
Before anything goes back together, grease every pivot and bearing cover. This is cheap insurance. The pivots on a full-suspension frame see constant small movement and are one of the first places corrosion or dry bearings show up as play or noise months down the line, and it costs nothing but a few minutes to get ahead of it now while everything is already apart.
Install the Cascade link and yoke using the factory hardware — Cascade designs their links to work with Specialized’s own pivot bolts, so there’s no proprietary hardware to track down separately. Snug every bolt by hand first and get the link seated correctly before you torque anything. Once everything is positioned right, go back through and torque each bolt to the spec in the Specialized service manual. Suspension pivots are not a place to eyeball torque — overtighten a pivot bolt and you’ll bind a bearing that’s supposed to move freely; undertighten it and you’ll get play and premature wear. The manual has the numbers for a reason.
For reference if you’re considering one yourself: the link runs $338 and comes in black, silver, or orange. Cascade also bundles it with their EXT shocks at a discount, which is worth a look if you’re already planning a shock upgrade alongside the link — buying both together knocks a meaningful chunk off the link’s price.
How it’s supposed to work with the GENIE shock
The GENIE shock’s whole trick is a two-chamber air spring: a linear, coil-like feel through the early and mid travel, then a steep ramp-up in the final portion of the stroke to resist bottoming out. Pairing that with a more progressive link is a deliberate stack, not a redundant one — the link’s job is to reshape how much wheel travel you get per unit of shock stroke, while the shock’s job is to control how that stroke feels as air spring pressure builds. A more progressive leverage curve on top of an already progressive shock should, in theory, mean I can run a bit less sag and still have full and controlled use of the extra 11mm of travel without harshness or unpredictable bottom-outs.
I’m writing this section before I’ve had real trail time on the finished setup, so I’m not going to claim results I haven’t earned yet. What I can say is that the combination makes sense on paper for what I wanted: a trail bike that still climbs and pedals like a Stumpjumper, but has a bit more room to work with when the terrain gets rowdy. I’ll report back on how the sag numbers and the ride actually feel once this bike has some real hours on it.
What’s next
With the link sorted, the next job was routing the rear brake hose through the frame before the fork went in — internal routing on this frame is not a five-minute job, and it’s worth its own post. That’s part three, coming next in the series.