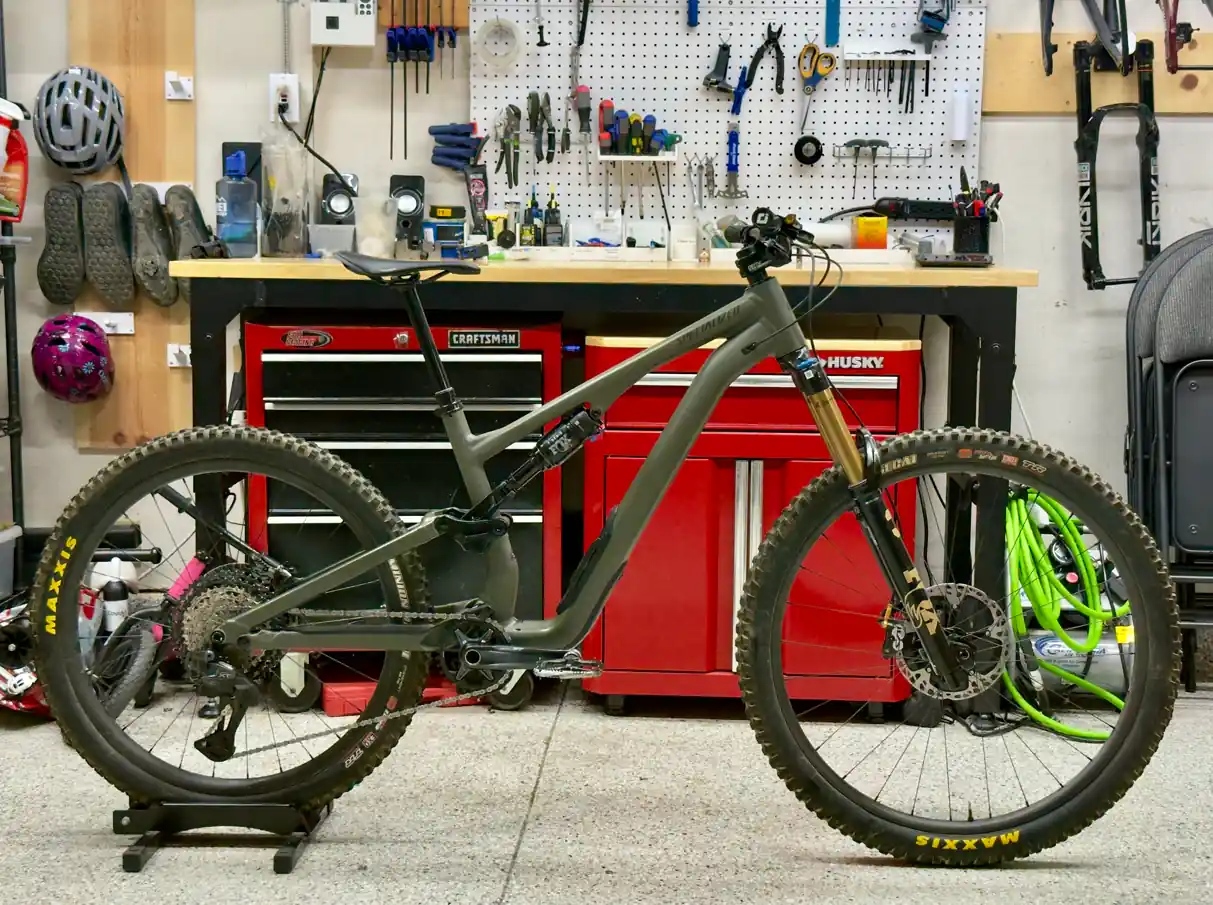
Every build starts with a question, and mine was blunt: could I put together a trail bike I’d actually trust on the descents, keep running for years, and not spend carbon-flagship money to get there? This series is the long answer, broken out from the full build video below into a few focused posts — I’ll walk through the suspension, the drivetrain, the routing that nearly broke me, and the final setup and weight. But before any of that, it’s worth explaining why I landed on this frame at all. Parts come and go. The frame is the one decision everything else has to live with.
The frameset made the choice easy
The short version is that Specialized handed me the excuse. The Stumpjumper 15 Alloy frameset lists at $2,299.99, and that price already includes the Fox Float Performance shock with GENIE technology — the same air-spring tech that carries the whole platform. I caught the frameset on sale for $1,499.99. When a brand drops a current frameset by eight hundred dollars, that’s usually a signal they need to move inventory, and I was happy to be on the receiving end of it.
Now put that next to the carbon side of the family. The S-Works carbon frameset is $3,500 on its own, and if you’d rather buy a complete carbon Stumpjumper 15, the builds run from around $4,500 up past $8,000 depending on how far down the spec sheet you go. So the math that started this whole project was simple: I could get the exact same 145mm GENIE platform, the same adjustable geometry, and the same frame design in aluminum for roughly a third to a half of what the carbon route costs — and then spend the difference on the parts that actually change how a bike rides. That trade is the thesis of this entire build.
What the platform actually gets you
The Stumpjumper 15 gives up the old split between the standard Stumpjumper and the Stumpjumper EVO. It’s now one frame with 145mm of rear travel through a Horst-link layout, and it’s built to be dialed rather than pigeonholed.
The headline piece is the GENIE shock, which Specialized co-developed with Fox. The clever bit is a two-chamber air spring: two positive chambers work together for most of the stroke, then the larger one seals off deeper in the travel so the spring ramps up hard at the end. In plain terms, you get coil-like suppleness and traction in the part of the travel you’re always using, and air-spring bottom-out resistance when you case something you shouldn’t have. Specialized publishes some big numbers around it — better bump-force management, more traction, fewer bottom-outs than a conventional air shock — and as an engineer I take any marketing percentage with a grain of salt. But the underlying concept is legitimately smart, and it’s not a gimmick you can bolt onto any frame; the kinematics were designed around it.
Beyond the shock, the frame gives you six-way geometry adjustment — head angle and bottom bracket height both tunable — plus the SWAT downtube storage door, a threaded bottom bracket, and internal cable routing (hold that thought for part three). Just as important for how I built mine: the frame accepts aftermarket shock links, which is the door to running a mullet setup and reworking the suspension curve. More on that shortly, because it’s where this build stops being a stock bike.
Why alloy over carbon, after breaking the habit
I used to be a carbon guy without thinking much about it. Then a Cannondale carbon frame of mine broke, and that put an end to assuming carbon was just the better material by default. I filmed the aftermath — it’s short, but it’s the whole argument in about fifteen seconds:
That’s not a blanket knock on carbon; plenty of carbon frames log years of hard riding without issue, and I’ve owned some of them. But it recalibrated how I weigh the tradeoff. A well-made aluminum frame gets you the same geometry and the same suspension kinematics as its carbon twin, and it tends to fail more gracefully — aluminum dents and warns you, where carbon can hide damage internally and then let go without much notice. For a bike that’s going to take rock strikes and the occasional bad line, that failure mode matters more to me now than it used to. I still don’t have a romantic attachment to any one material — I just want the one that tells me when it’s hurt.
The honest tradeoff is weight, and I’m not going to pretend otherwise. The alloy frame is heavier than its carbon twin, and this build came out on the portly side (I’ll put the exact number on the scale in the final post). But this was never a weight-weenie project. It’s a capability-and-reliability project on a budget, and every place I spent money, I spent it where it changes the ride rather than where it shaves a spec-sheet gram.
Where the money actually went
Here’s the full build, each piece of which gets its own deep dive later in the series:
Frame & suspension: Stumpjumper 15 Alloy frameset with the stock Fox Float Performance GENIE shock, paired with a Fox 36 Factory fork (160mm travel) that I bought used. A high-end fork loses a big chunk of its value the moment it’s mounted, and the internals are serviceable, so buying gently used is the single easiest way to get flagship damping without paying flagship prices. I also swapped the stock 29er shock link for a Cascade Components 156mm mullet link, which bumps rear travel and makes the suspension more progressive while keeping the geometry sane — there’s a good story behind getting that link built for this frame that I’ll save for part two.
Drivetrain: Shimano XT Di2 — wireless rear derailleur and shifter — with an XT M8120 crank and an XT 12-speed cassette. There’s a chainline gotcha that forced the crank swap, which I’ll cover in part four.
Brakes: Shimano Saint, front and rear, with 203mm rotors both ends. Saint is overkill for a lot of trail riding, and that’s the point — I wanted stopping power I never have to think about.
Wheels & tires: BTLOS carbon rims laced to an Industry Nine front hub and a DT Swiss 240 rear, wrapped in a Maxxis Assegai 29x2.5 up front and a Maxxis DHR II 27.5x2.4 out back to match the mullet setup. Wheels are the one place I happily paid for carbon performance — rotating weight and stiffness are what you actually feel on a trail bike, in a way a carbon frame isn’t.
Cockpit & finishing kit: a OneUp V3 dropper at 180mm, ODI grips, a OneUp chainguide and bash guard, and OneUp aluminum pedals — cheap insurance for the drivetrain and a reliable platform underfoot.
The result, and what’s coming next
The finished bike is exactly what I set out to build: a capable, reliable trail machine that punches well above what I spent, assembled around a frameset that cost less than a lot of people’s wheelsets. It isn’t light, and I made peace with that going in. It’s built to be trusted and built to last, and it got there for a fraction of carbon money.
Here’s how the rest of the series breaks down:
- Part 2 — The Cascade 156mm Mullet Link & GENIE Shock: more travel, more progression, and the story of getting a link built for this generation of frame.
- Part 3 — Internal Cable & Brake Routing: the part of this build nobody enjoys, plus a rotor-size surprise.
- Part 4 — The Shimano XT Di2 Drivetrain: fork install, a chainline gotcha, and Di2 tuning.
- Part 5 — Final Assembly, Setup & Weight: the finishing touches, sag, and the number on the scale.
And once it’s been out on the trail long enough to say something honest, a full ride review to close the loop. If you’ve built up a Stumpjumper 15 — alloy or carbon — I’d love to hear what you’d have done differently.